Create Your AWS Account
➜ Visit the AWS website (opens in a new tab) and search for EC2.
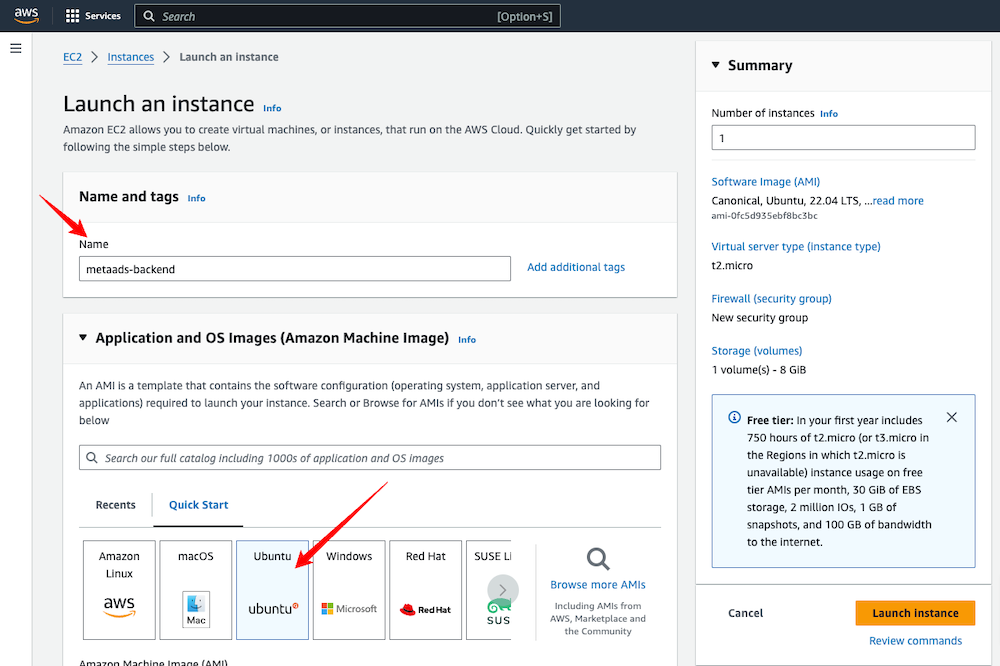
➜ Click on "Launch Instance" to create a new one. Check Amazon EC2 – Instance Types (opens in a new tab) for information on instance types.
➜ Give your instance a suitable name.
➜ Select "UBUNTU" as the Amazon Machine Image.
➜ In the Key-pair section, create a new key pair if you don’t have one. Save it on your local machine. This key helps you log in using an SSH client.

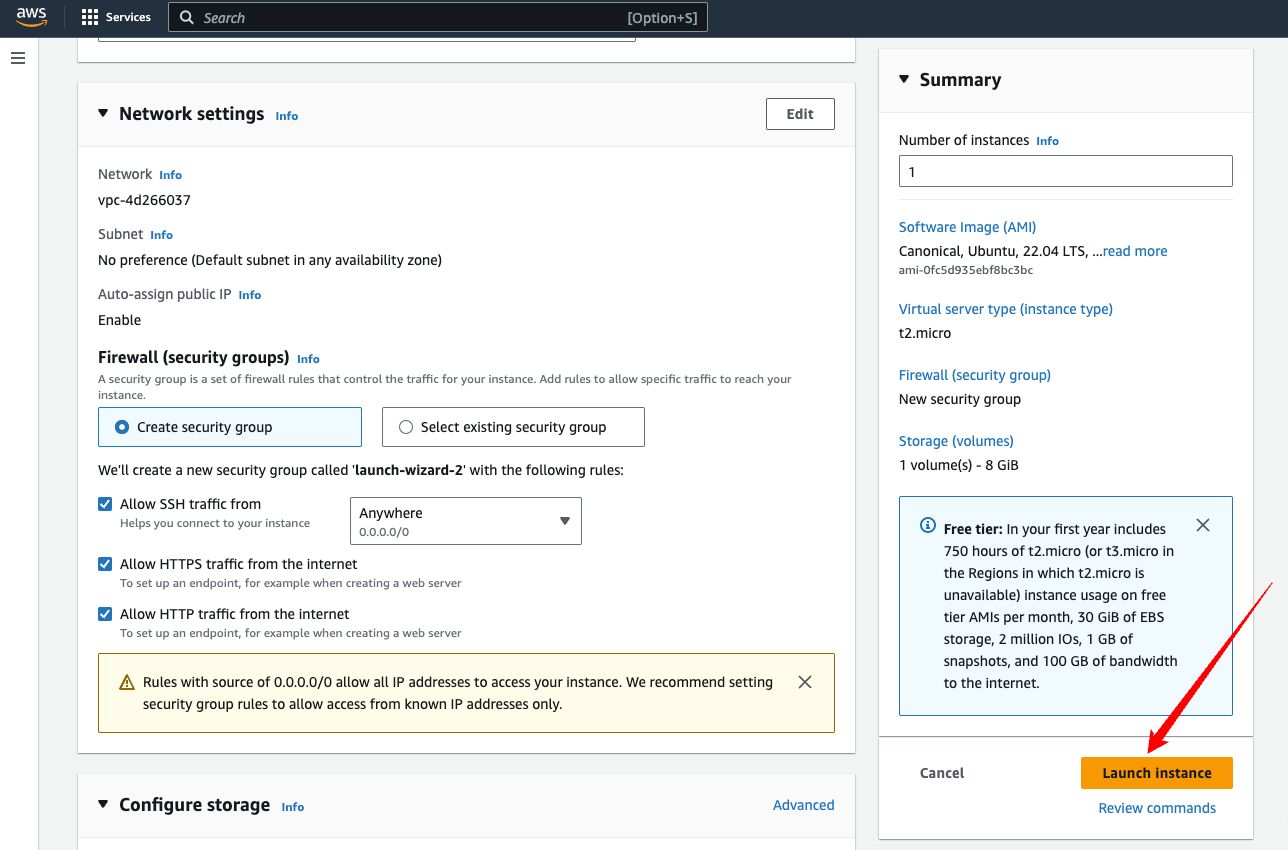
➜ In the Network Settings section, allow HTTPS and HTTP request traffic required for a web server.
➜ With these settings, click the "Launch Instance" button at the bottom right.
➜ Wait a few seconds for the instance to start completely and go into a running state.
Connecting to the Instance Using SSH Client
➜ Once the instance is running, click on the Instance ID. Open the page with details and click the "Connect" button.
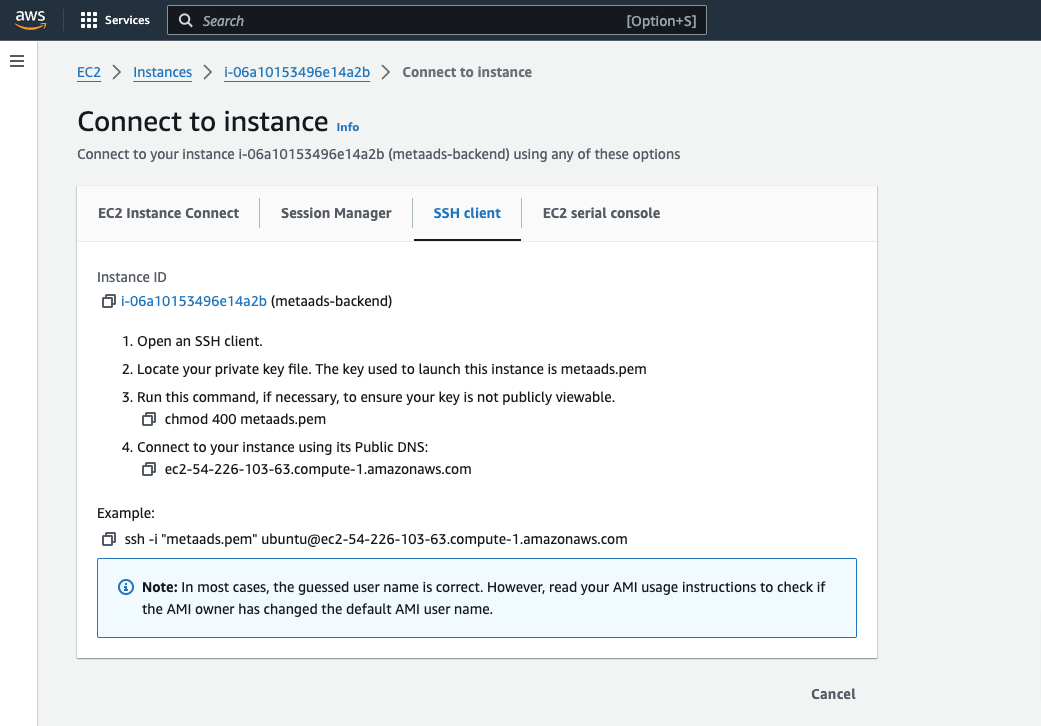
➜ Open your SSH client on your computer (Terminal for Linux/MacOS, PuTTy for Windows).
➜ Go to the folder where your private key is stored using the command: cd <path-to-your-folder>.
➜ Give execute permission to the secret key file with: chmod 400 <privateKeyFile.pem>.
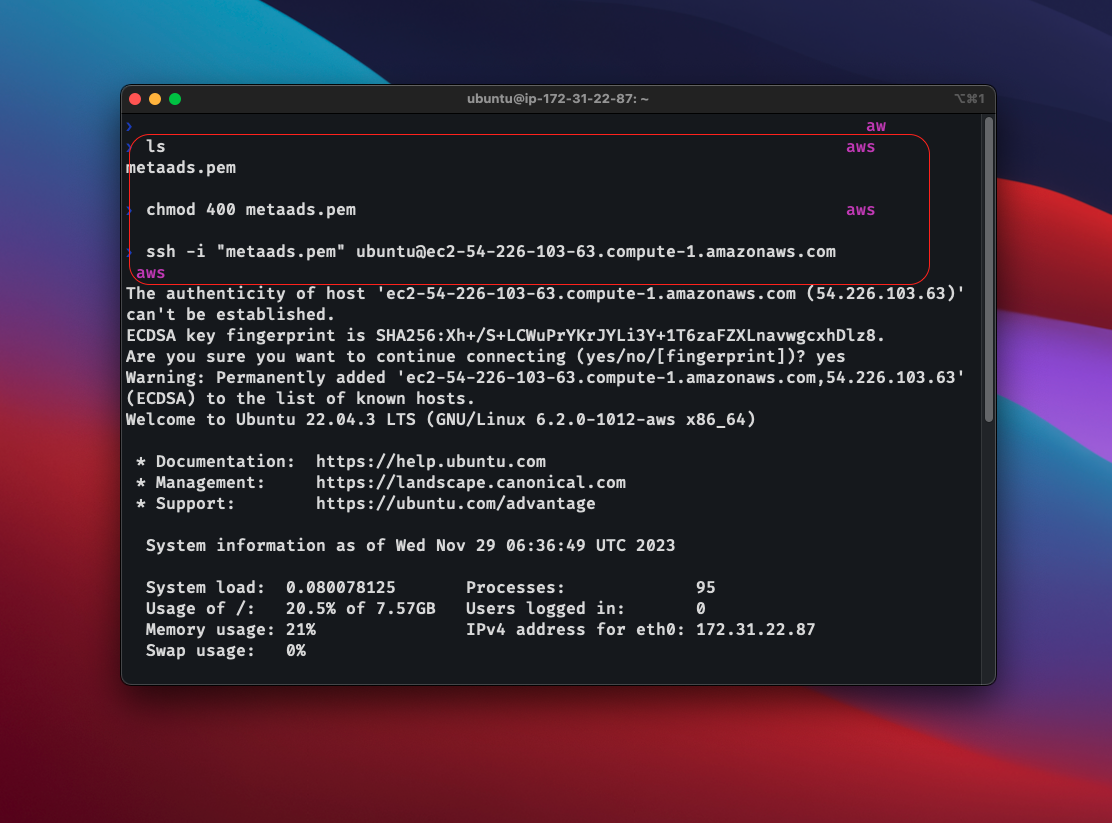
➜ Copy the command from the Example section, execute it in your terminal, and when asked to continue connecting, type "yes" and press Enter.
➜ You are now connected to your AWS instance from your local machine using an SSH client.

Install Docker & Git on the Instance
** ➜ To Instll Docker check their offcial documentation (opens in a new tab)**
➜ Update the package index using the command: sudo apt-get update.
➜ Install Docker using the command:
# Add Docker's official GPG key:
sudo apt-get update
sudo apt-get install ca-certificates curl gnupg
sudo install -m 0755 -d /etc/apt/keyrings
curl -fsSL https://download.docker.com/linux/ubuntu/gpg | sudo gpg --dearmor -o /etc/apt/keyrings/docker.gpg
sudo chmod a+r /etc/apt/keyrings/docker.gpg

# Add the repository to Apt sources:
echo \
  "deb [arch=$(dpkg --print-architecture) signed-by=/etc/apt/keyrings/docker.gpg] https://download.docker.com/linux/ubuntu \
  $(. /etc/os-release && echo "$VERSION_CODENAME") stable" | \
  sudo tee /etc/apt/sources.list.d/docker.list > /dev/null
sudo apt-get update
sudo apt-get install docker-ce docker-ce-cli containerd.io docker-buildx-plugin docker-compose-plugin** ➜ To Instll Git run the following command:**
sudo apt-get install gitAlso Create Docker docker volume create caddy_data to store caddy data
sudo docker volume create caddy_dataClone the Repository to the Instance
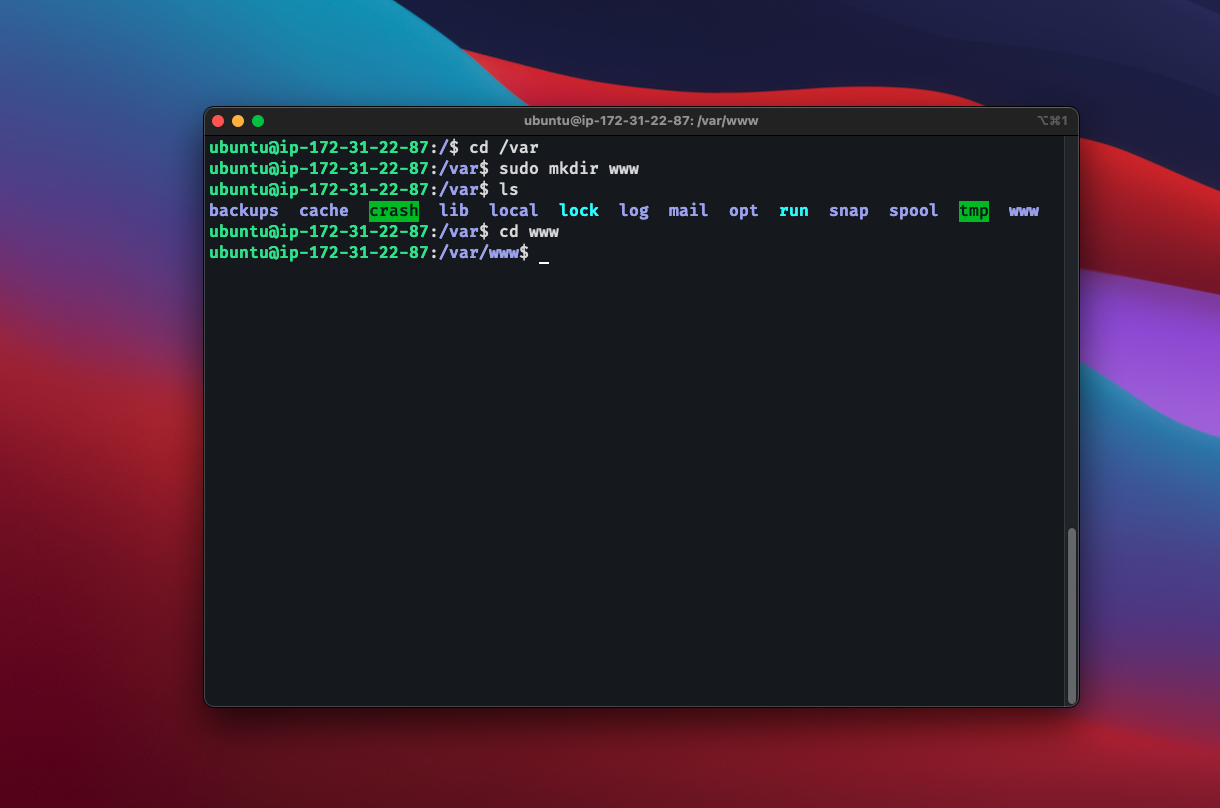
➜ Locate the folder var using the command: cd /var and create the folder www with: sudo mkdir www.
➜ Go to the www folder using the command: cd www
➜ Clone the repository using the command: sudo git clone <repository-url>.
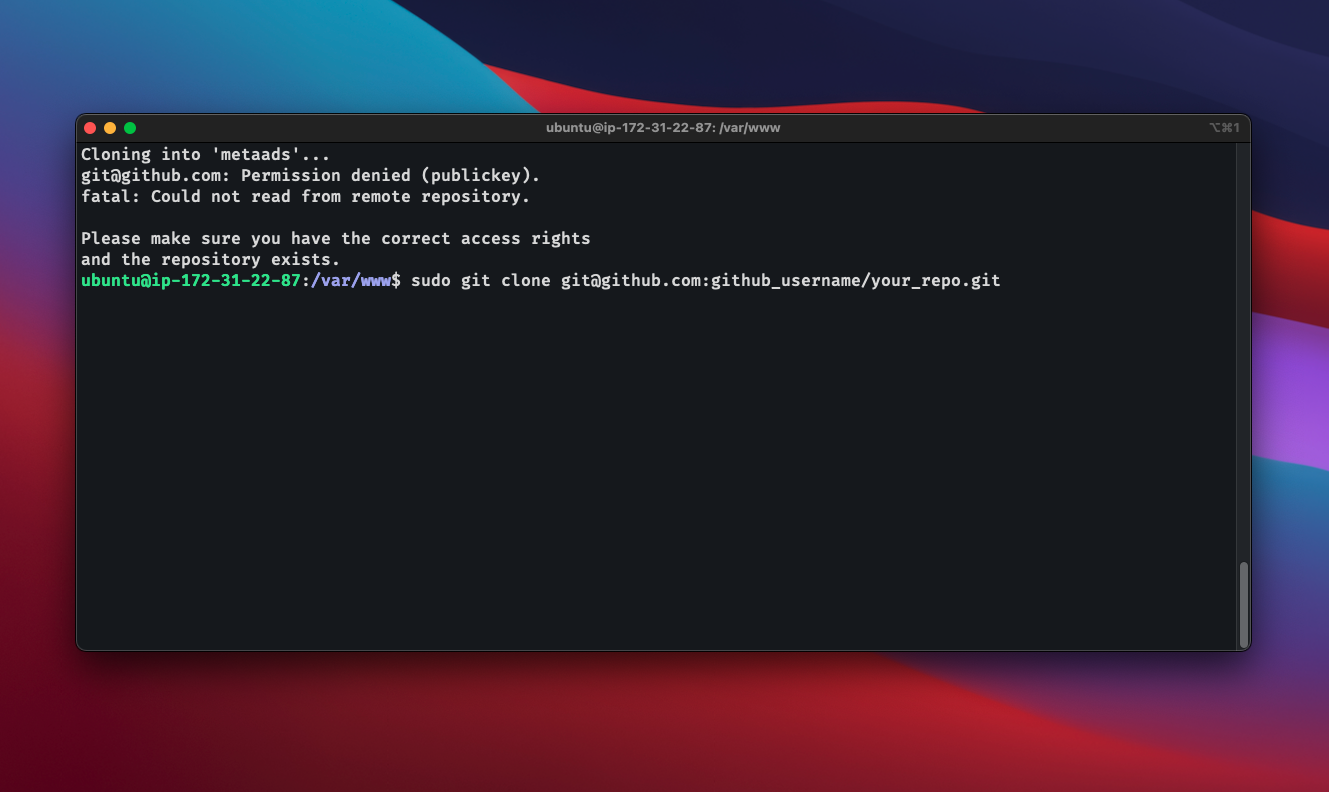
Error: If your clone is unsuccessful, and you encounter the error "fatal: Could not read from the remote repository. Please make sure you have the correct access rights and the repository exists," You need to generate a public key and private key, and then add the public key to GitHub. For more details, refer to this link: GitHub SSH Key Setup (opens in a new tab)
Note: If you are successfully able to clone the repository, follow the steps below.
➜ Go to the cloned repository folder using the command: cd <repository-name>.

Build the Docker Image
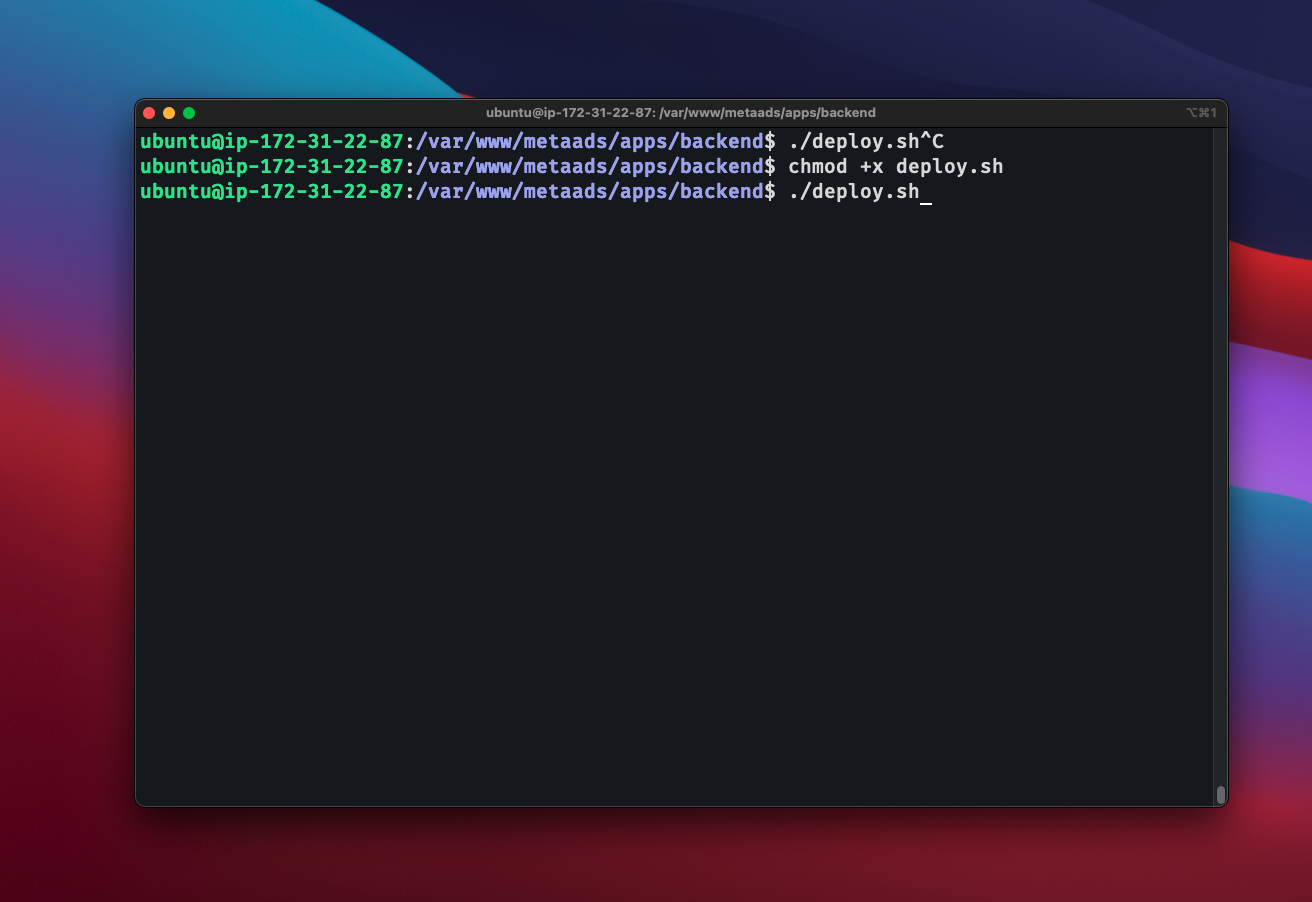
➜ chmod +x deploy.sh to give execute permission to the deploy.sh file.
➜ ./deploy.sh to pull the latest changes from the repository and build the docker image.
Error: If you encounter the error permission denied while trying to connect to the Docker daemon socket at unix:///var/run/docker.sock: connect: permission denied.
You need to add the user to the docker group. Run the following command: sudo usermod -aG docker $USER and then restart the instance.
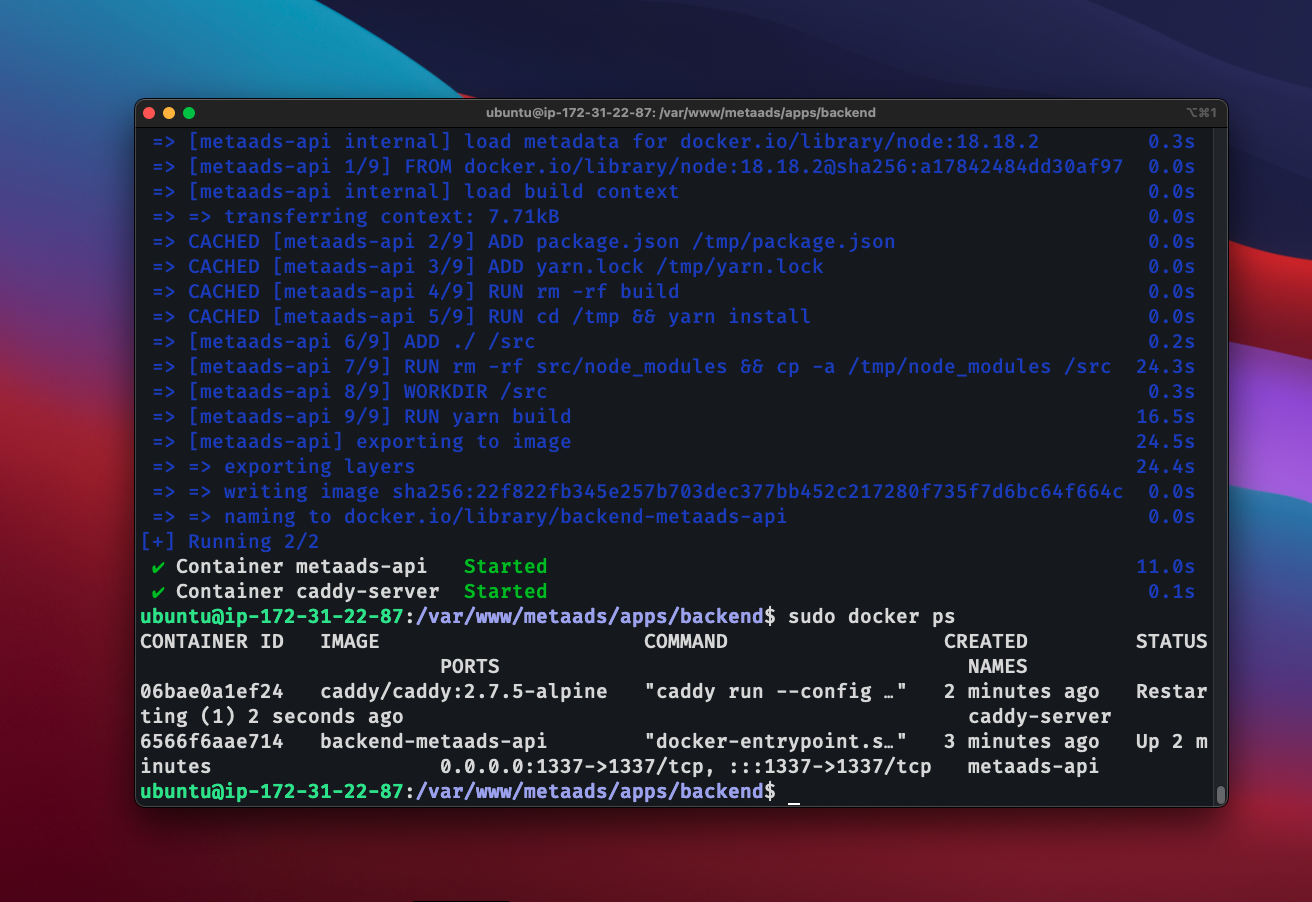
You can also run sudo docker compose up -d --build to build the docker image.
If Build is successful, Check it by running sudo docker ps command. You will see the running container.
Connecting a Subdomain to Your Caddy Server in Docker
Step 1: Obtain a Domain Name
If you don't have a domain name, register one from a domain registrar like Namecheap or GoDaddy.
Step 2: Set Up DNS Records
- Log in to your domain registrar's website.
- Navigate to the DNS management section.
- Add a new DNS record of type A for your subdomain, pointing to the IP address of your aws ec2 instance.
Step 3: Modify Caddyfile
- Access the Caddy configuration file (Caddyfile) in your Docker container. This is usually located at
apps/backend/Caddyfile. - Open the Caddyfile using a text editor.
- Locate the section where your domain is configured. It might look like:
subdomain_name.example.com {
 reverse_proxy metaads-api:1337  {
        header_down Strict-Transport-Security max-age=31536000 ;
    }
}
- Replace the subdomain name with your subdomain name.
Replace yourdomain.com with your subdomain. Save the changes.
- Restart Container Your Docker container
sudo docker compose up -d --build- Test Visit your subdomain in a web browser to ensure the connection is successful. You should see the content hosted on your Caddy server.
Note: Contgradulations! You have successfully deployed your backend on AWS EC2 Instance.
Assistance required? If you need any assistance, feel free to reach out to us support@jstemplate.net