Quick Start Guide
Welcome to MetaJob – a powerful job board solution powered by Next.js & Strapi. This guide will walk you through installing the public version and optionally unlocking the premium theme using a private token.
✅ Prerequisites
Ensure you have the following installed:
- Node.js v20 or higher
- pnpm (recommended)
📦 Install pnpm globally:
npm install -g pnpm🚀 Installation Steps
1. 📁 Clone the Repository
Clone the repository: MetaJob GitHub Repo (opens in a new tab)
2. 🛠 Configure Environment Variables
🔄 Rename Environment Files
mv apps/backend/example.env apps/backend/.env
mv apps/frontend/example.env apps/frontend/.env
Make sure to fill in any required values in both .env files.
You'll also need accounts for the following services for backend .env:
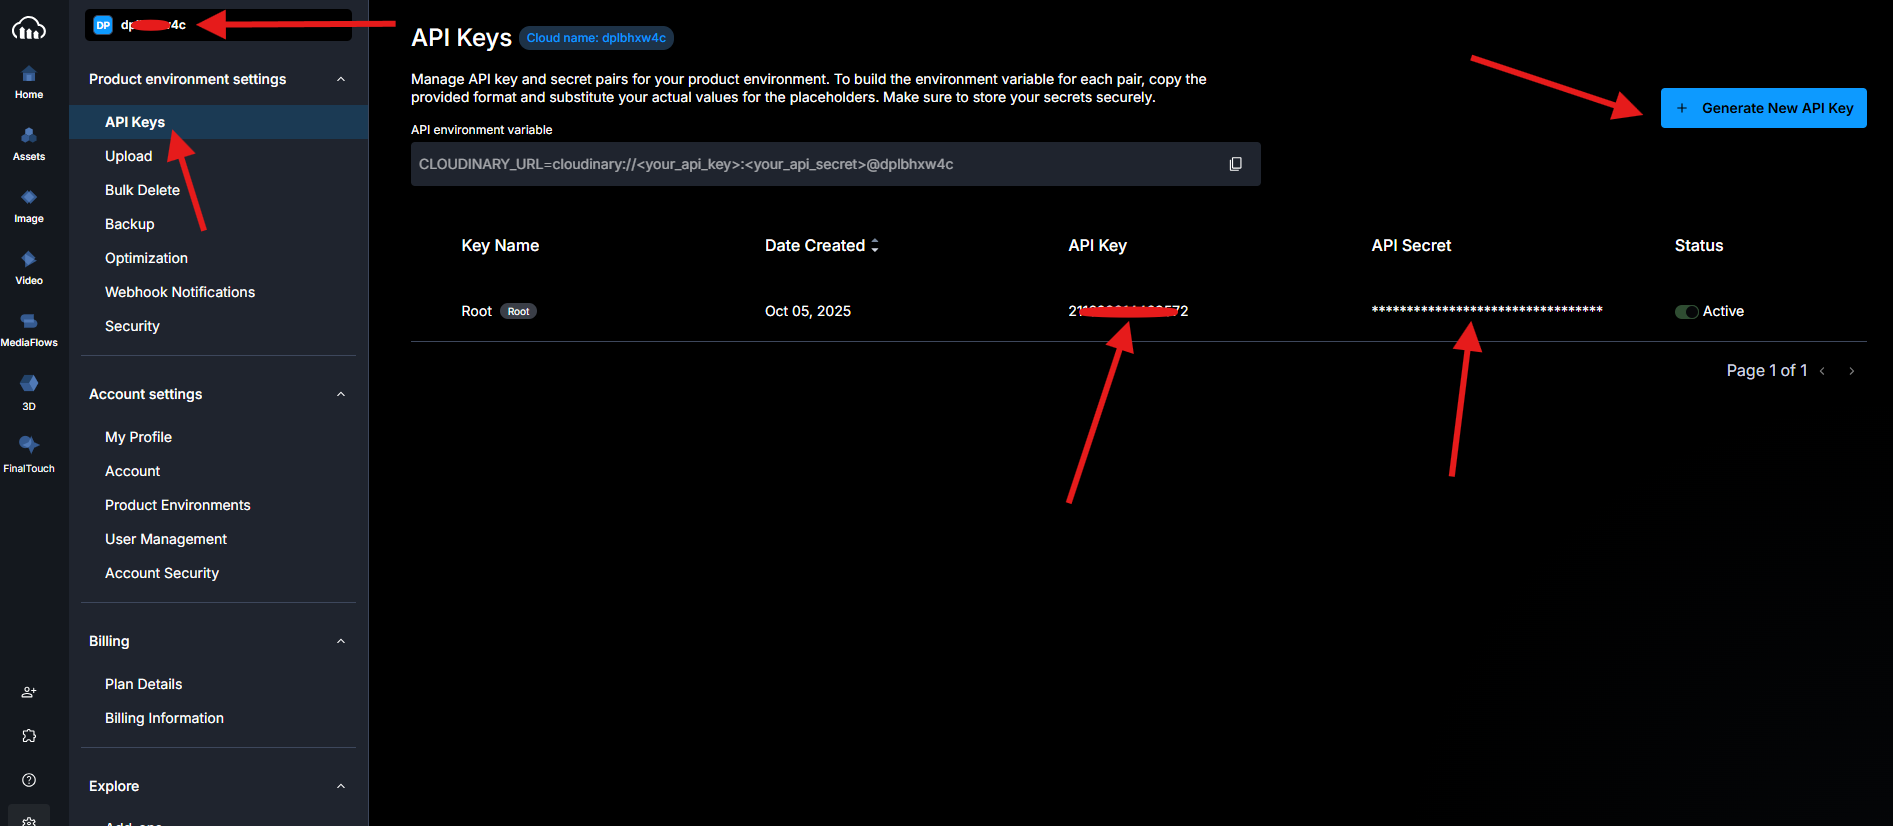
Cloudinary – for media/file uploads
👉 https://cloudinary.com (opens in a new tab)
1. Go to Cloudinary Signup Page and create a free account.
2. After logging in, open your Dashboard.
3. Add the following environment variables to your .env file:
- CLOUDINARY_KEY
- CLOUDINARY_NAME
- CLOUDINARY_SECRET
4. Add the following environment variables to your .env file
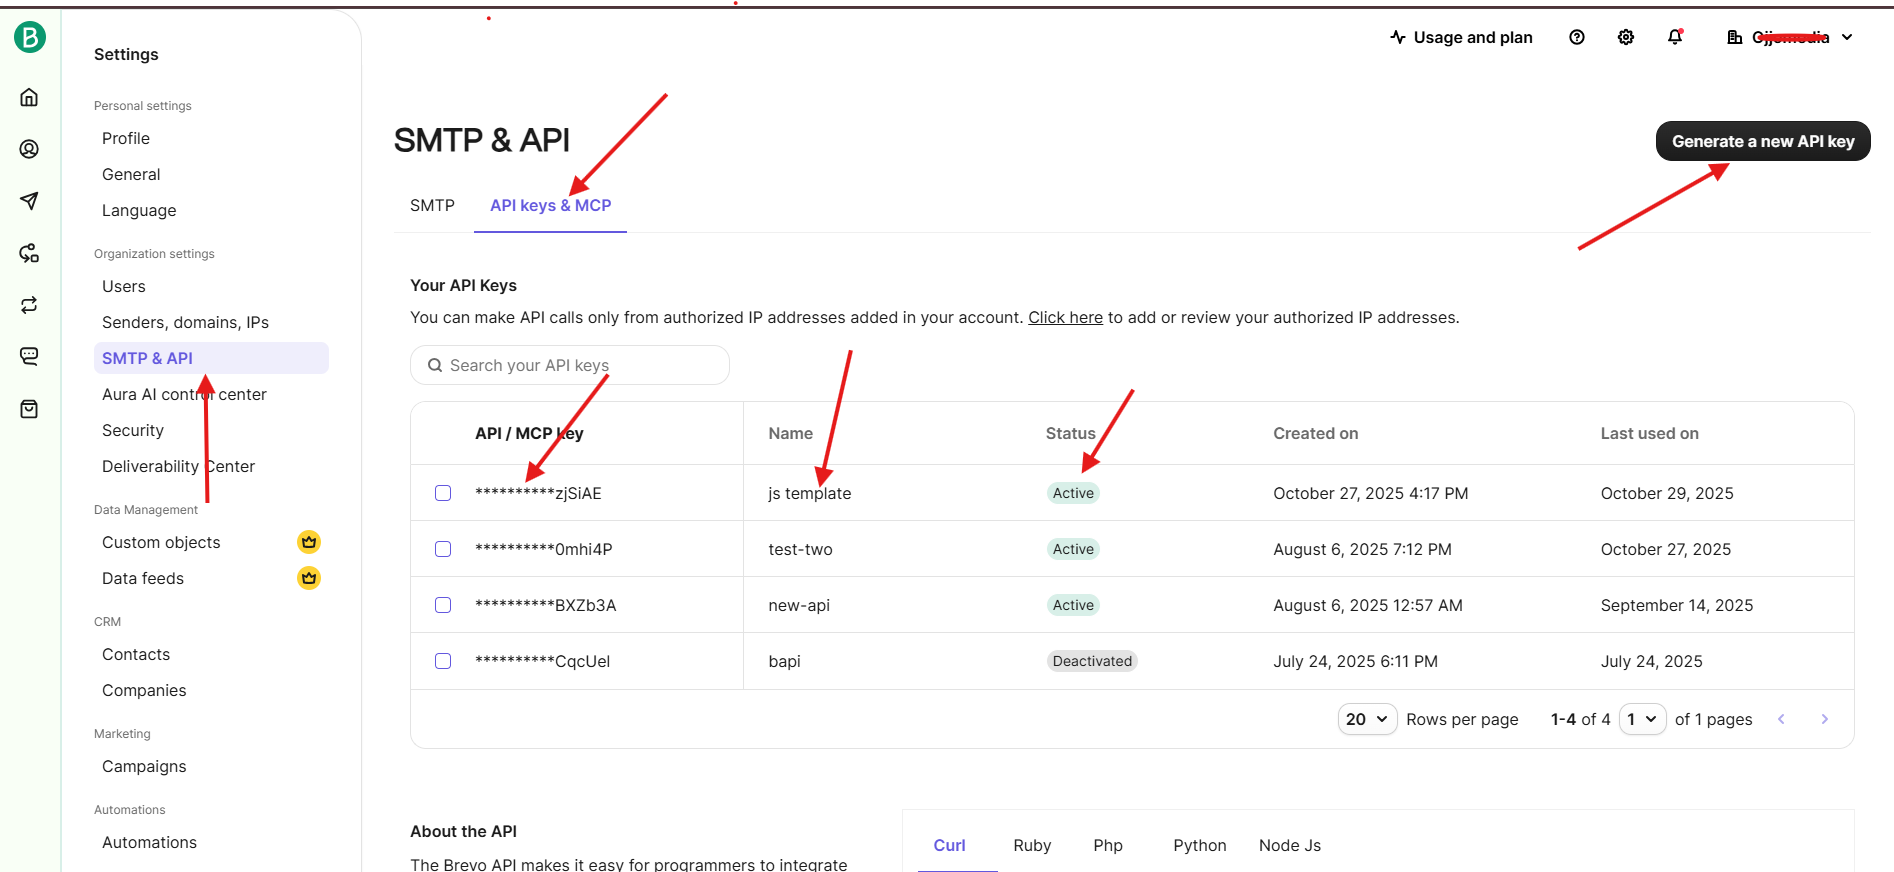
Brevo (formerly Sendinblue) – for sending transactional emails
👉 https://www.brevo.com (opens in a new tab)
1. Sign up or log in to your Brevo account.
2. Go to SMTP & API → API Keys & MCP from the dashboard sidebar.
Direct link to the desired page (opens in a new tab)
3. Click "Generate a new API key" and name it (e.g., Strapi App).
4. Copy the generated API key.
5. Add the following environment variables to your .env file: (Here use the email you are using to login Brevo for EMAIL_EMAIL)
- EMAIL_NAME
- EMAIL_EMAIL
- BREVO_API_KEY
3. 📦 Install Dependencies
Once everything is set up, you're ready to install project dependencies from root directory:
pnpm install4. ⚙️ Run the Backend (Strapi)
pnpm -F backend devVisit the Strapi admin at 🔗 http://localhost:1337/ (opens in a new tab)
🔑 Generate an API Token
- Create an admin account.
- Go to Settings → API Tokens.
- Create a Full Access Token.
- Add the token to the front end
.envfile:
5. 💻 Run the Frontend (Next.js)
pnpm -F frontend devFrontend available at 🔗 http://localhost:3000/ (opens in a new tab)
6. 📥 Import Demo Data (Optional)
Now that your backend and frontend are ready, it's time to import the demo data.
You will find the demo data zip file inside apps/backend, named metajob-import.tar.gz.
-
Navigate to your
apps/backendfolder. -
Run the following command:
pnpm strapi import -f metajob-import.tar.gz --exclude files
This will import the dummy data.
- Reload the frontend, and you should see the full site ready with dummy data.
⚠️ If the frontend does not load the data, simply delete the .next folder and rerun the project.
If you face any issues during installation, please send an email to info@jstemplate.net.